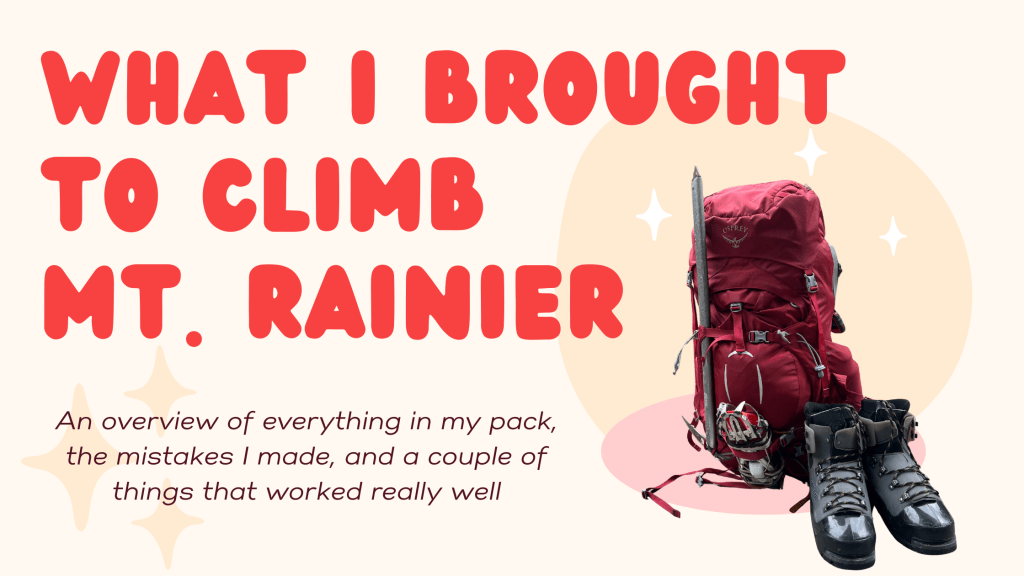
Hopefully, if you’re thinking about climbing Mt. Rainier, you’ve got some hiking or mountaineering experience under your belt and aren’t starting to build your outdoor setup from scratch. If you are, I’m going to outline what that might cost, what I actually packed, and what I wish I would’ve done differently (it’s not really a badge of honor that you have the heaviest pack among your climbing troupe).
I’ve never broken down the cost like this before because I amassed a lot of this stuff over the years, so I’m curious (and afraid) to see what it adds up to!
The List
Any reputable outfitter that you use to climb Rainier will provide a packing list. Each list may vary slightly in details, for the purpose of this breakdown, I’ll be using International Mountain Guides (IMG) since that’s what I used to build my own.
| Clothing | Underwear (2) , sports bras (2), wool socks (3), sun hoody (2), base layer pants (1), midweight puffy (1), soft shell jacket (1), soft shell pants (1), parka (1), hard shell jacket (1), hard shell pants (1) | $1,694 total |
| Gloves | Liner, lightweight, midweight, heavyweight | $102.44 total |
| Head & Face | Sun hat, beanie, buff, glacier glasses, goggles, sunscreen, lip balm, zinc, LED headlamp/batteries | $587 total |
| Footwear | Trail shoes (if applicable, we didn’t use them because we reached snow about 20 minutes in), gaiters (optional), single or double climbing boots depending on the season | $203 total (not including gaiters, we didn’t use them) |
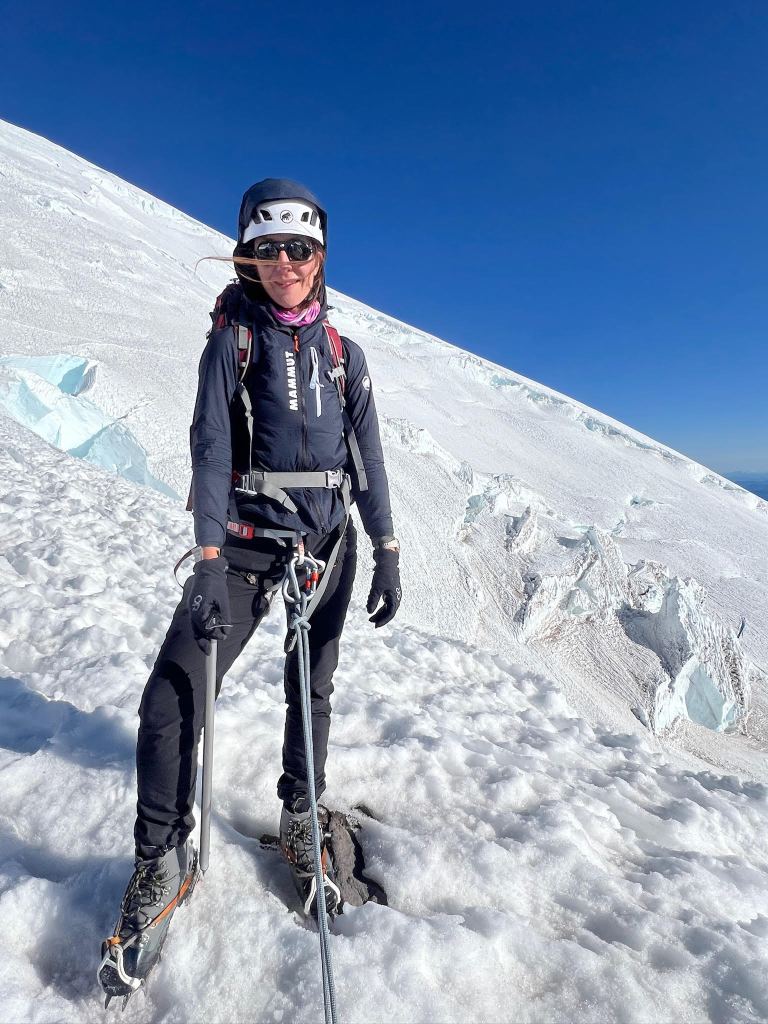
| Cllimbing Gear | 60-80L backpack, trekking poles, climbing helmet, climbing harness, climbing hardwear (carabiners), crampons, ice axe | $706.95 |
| Personal Equipment | Sleeping pad, sleeping bag, ear plugs, first aid kit, toiletries, liner trash bag | $351.21 |
| Food & Water | 2 nalgenes, camping bowl/mug/cutlery set, electrolytes, personal food | $159 |
| Luxury Items | Powerbank, Garmin inReach (you’ll need an active subscription too, but you do NOT need this – there’s wifi at the flats and Muir!) | $450 |
Estimated Total – $4,253 in gear
Weight
Does ultralight gear matter a lot? It depends on your comfort level – I would prioritize not skimping on 5 things specifically – parka, sleeping set up, food, socks, and boots. This doesn’t mean that you can’t find a good sale (I utilized the cash back at Rakuten a lot, as well as a mix of my REI rewards, some pro discount codes, and lots of late night sleuthing for deals) or that the best option is necessarily the most expensive, but I think it’s important to be super intentional about those items specifically.
I’m not necessarily a weight weenie (I just discovered this term) but I also don’t want to be shlepping unnecessary stuff (unless it’s candy) so I do try to pay attention to that as I buy anything new. And I feel like with outdoor recreation, you can kind of upgrade that gear in spurts. I am still using my Osprey Ariel 65 pack, which feels a little bulkier and out of date for the capacity at 4.89 lbs, but did I feel the need to run and spend $400 on a hyperlite pack for this trip to save 2.72 lbs? Though they are super nice, definitely not.
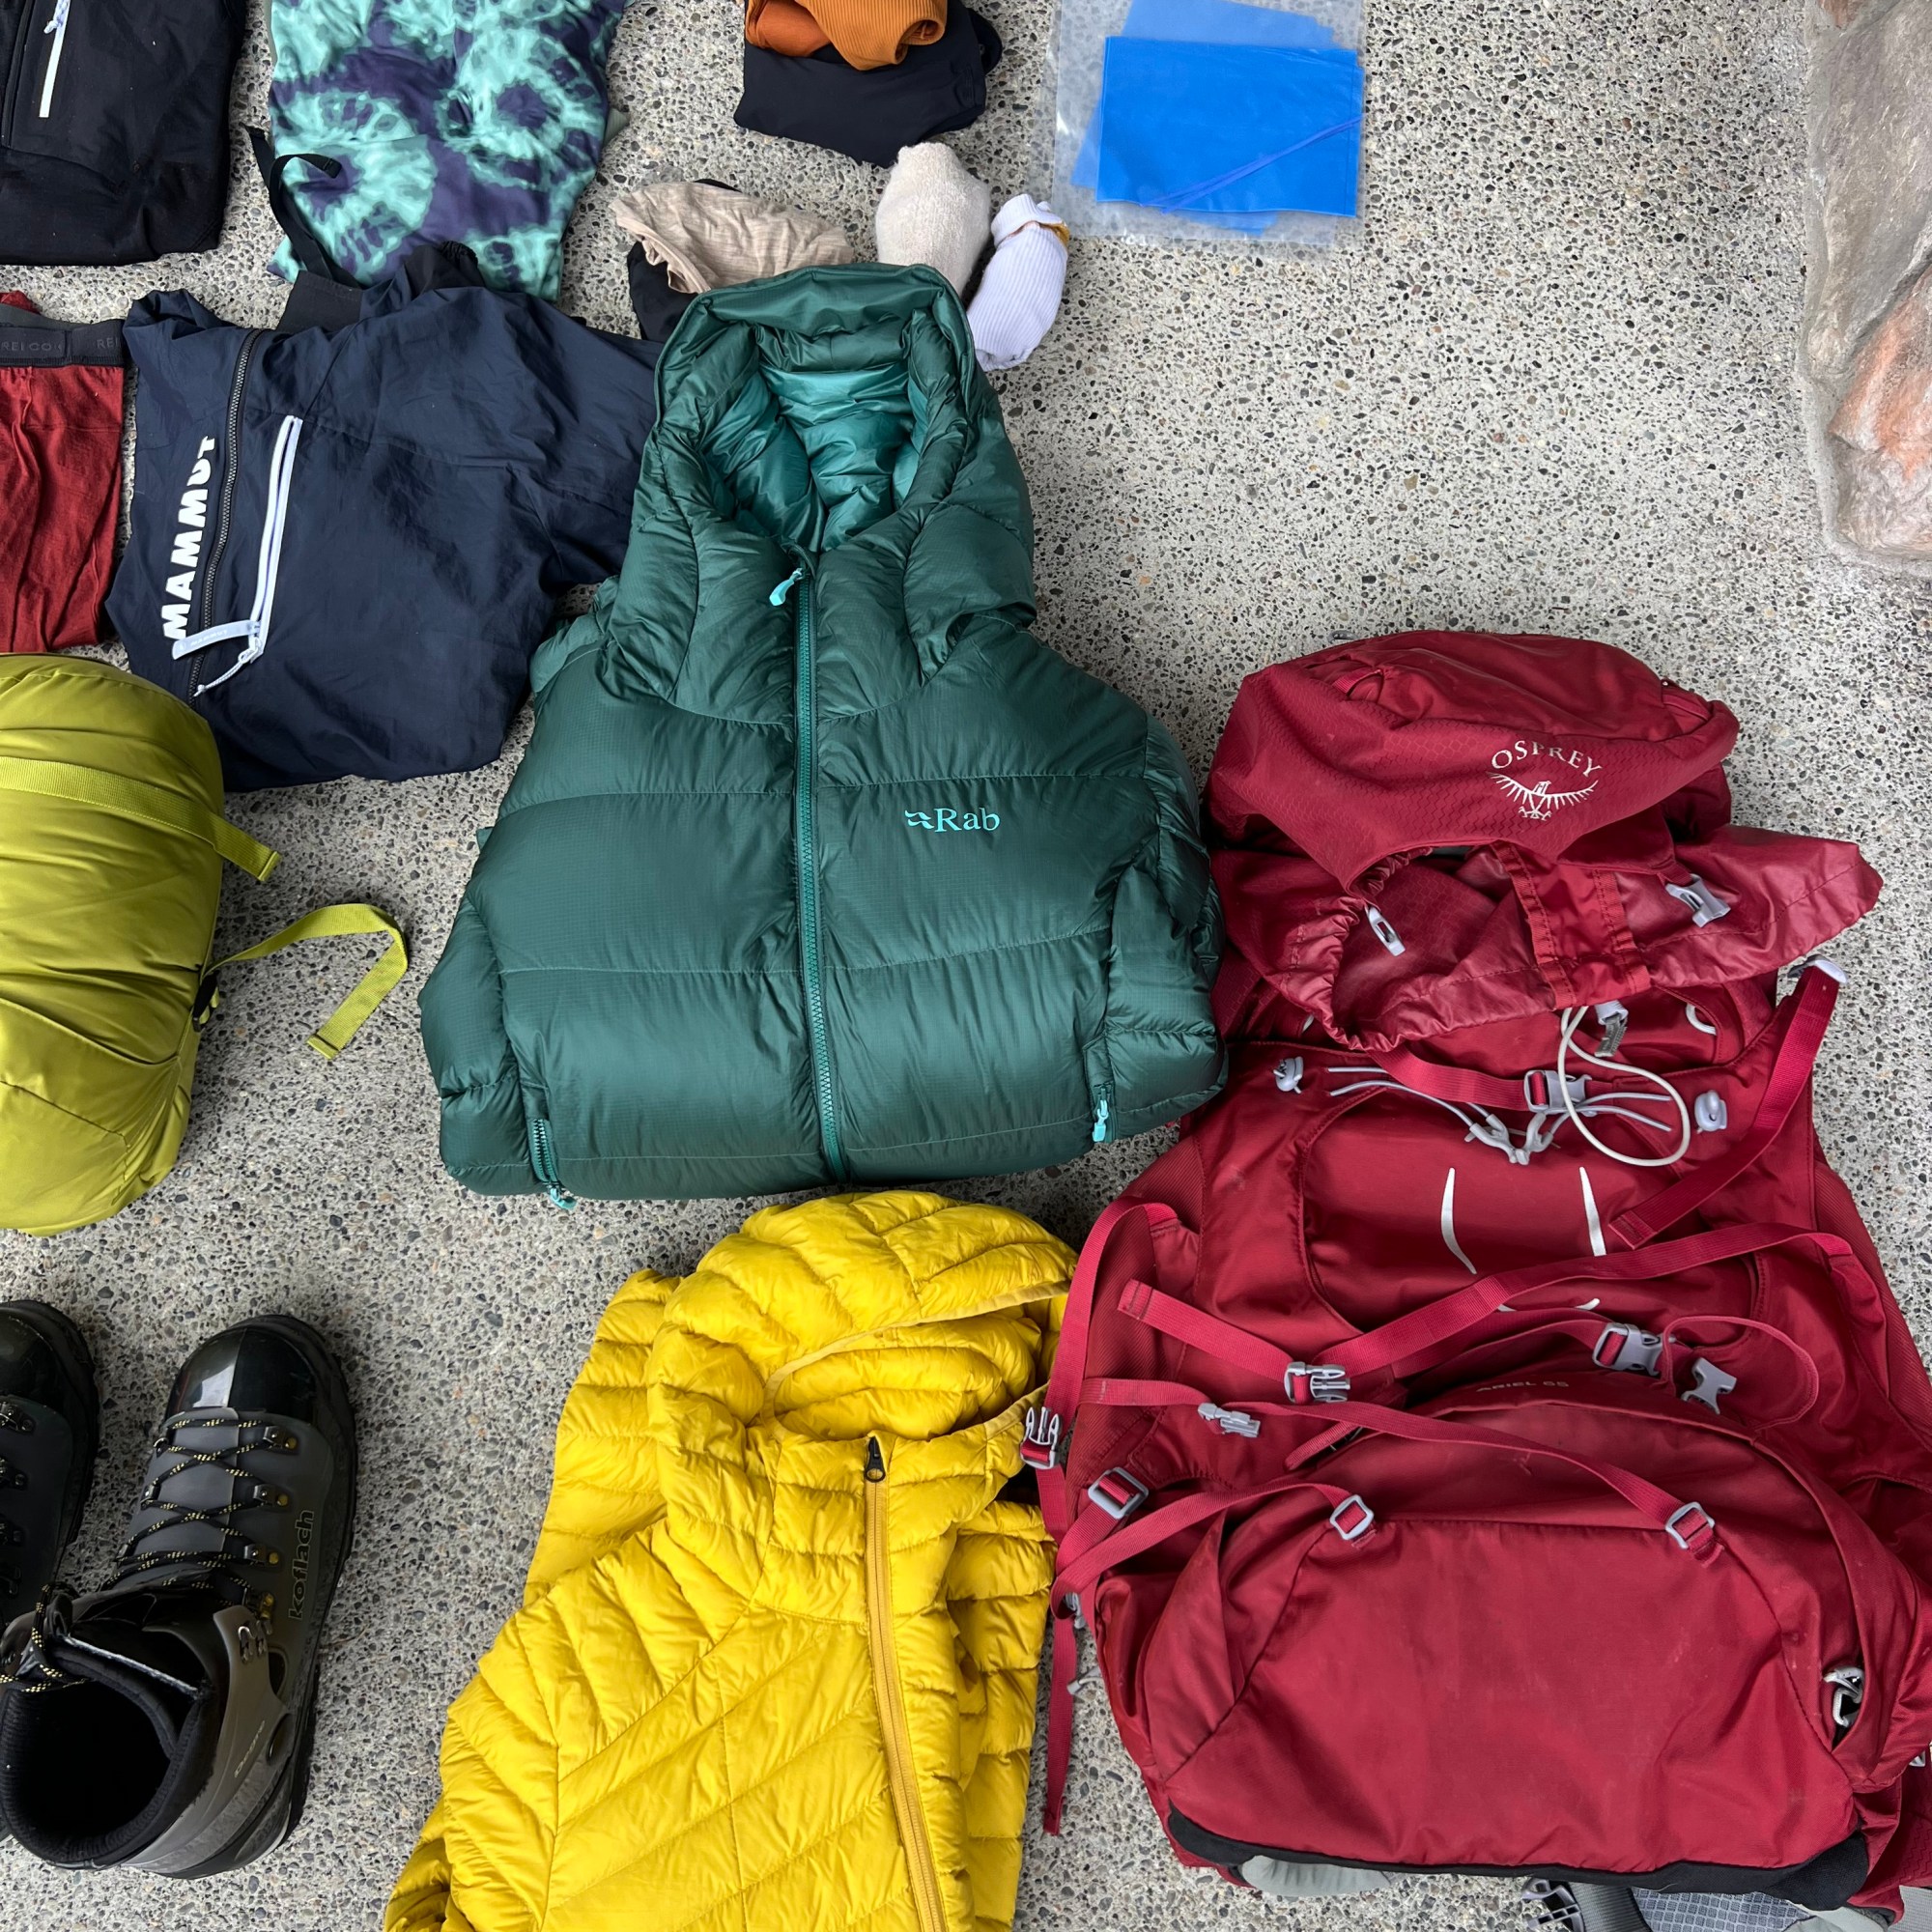
After climbing Baker last year, I was stubborn about the parka. We barely used our midweight puffy on that climb, and it was, besides the 0* sleeping bag, the only “big” purchase I would have to make for this trek. As a result, I spent a lot of time in reddit spirals about hydrophobic goose down, baffle construction, and claimed weight vs. fill weight.
I had a few jackets on my list but I ultimately ended up with – and am OBSESSED with – this Rab Neutrino Parka. 10/10, no issues to report, just absolute cozy bliss. I picked it up on sale around $315 which felt like a great deal. It felt as close to walking around in my sleeping bag (another 10/10 purchase, which we’ll get into later) as one could get. It definitely was heavy, weighing in at 1 lb 9.7 ounces, but I was so happy I bought it.
I actually also purchased this Patagonia Fitzroy parka (which I had problems linking, so it might be discontinued), but it was substantially lighter in a way that felt like it wouldn’t be warm enough, and I ended up returning it. That model specifically was on the list from IMG, so I imagine it could’ve worked, but ultimately I sacrificed weight for comfort and would do it again in a heartbeat.
Sleeping set up
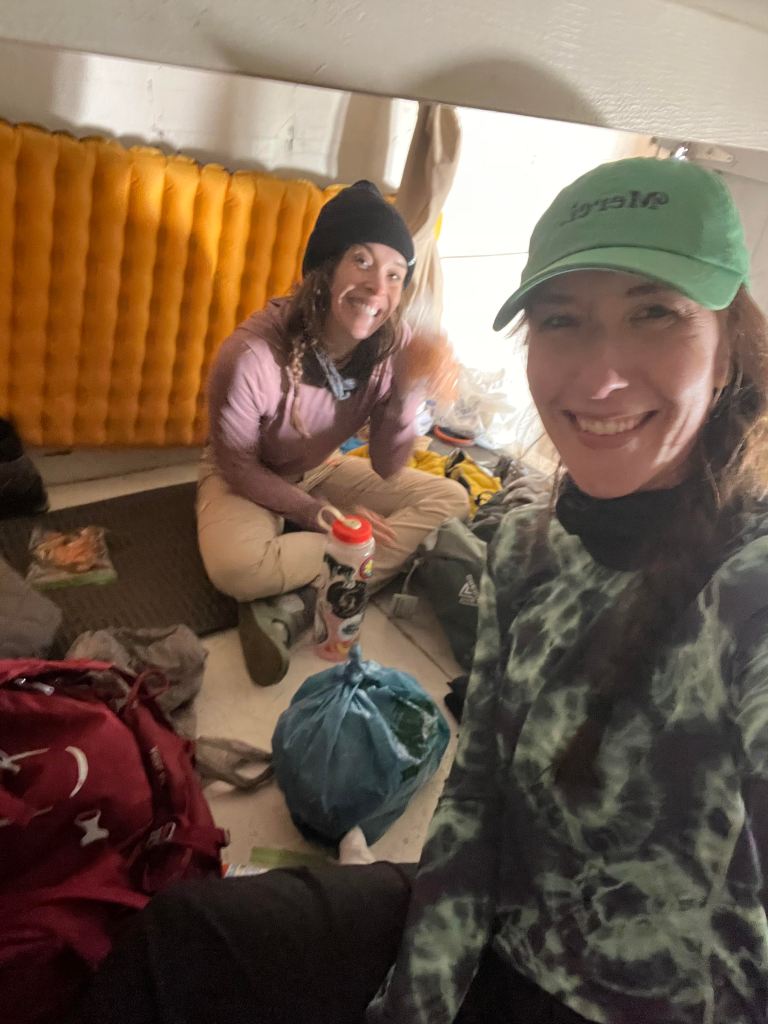
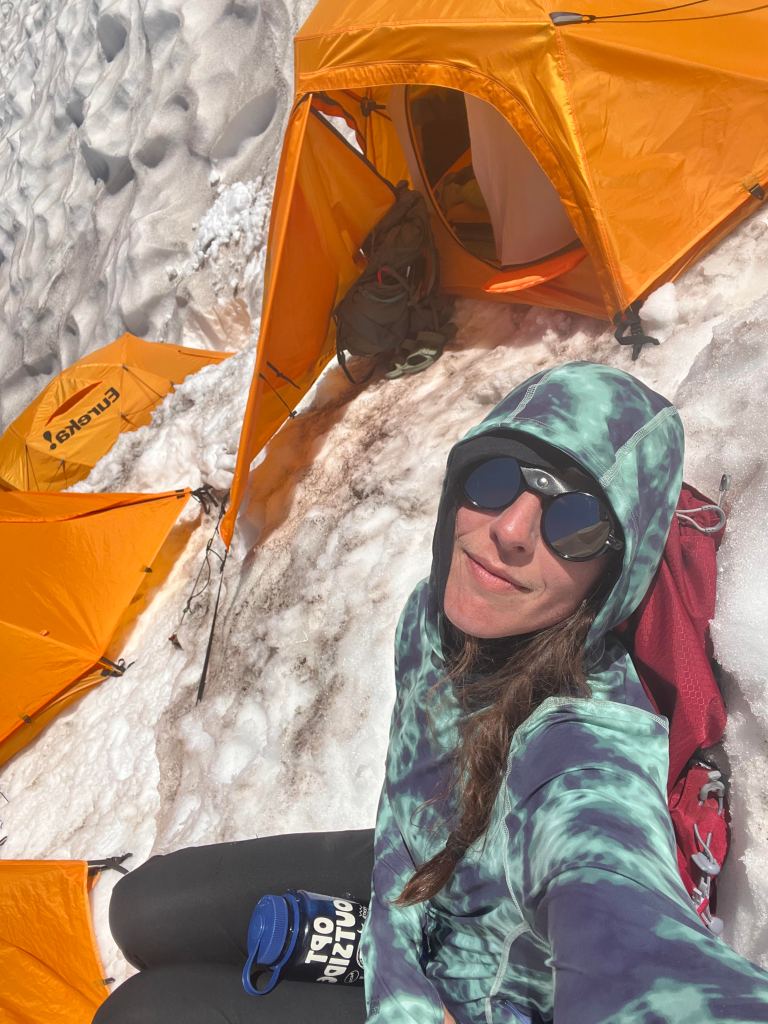
One of the best parts about climbing with an outfitter is not having to lug camp equipment, a tent, etc. up the mountain. IMG actually had sleeping pads for us so we didn’t need to bring those either – such a nice surprise! We actually spent 2 nights at Camp Muir on the ascent- one in the Gombu (named after Nawang Gombu Sherpa), the other in tents. Our expected high camp location, Ingraham flats, was rocked by a huge serac fall a few weeks before which rendered the site unsafe for us but that meant that we had lighter packs for the summit push.
I used the Bishop Pass sleeping bag from Mountain Hardware and my god was it magical. I have a little PTSD from sleeping bags after my friend and I shared one (blanket over us style, not trying to squeeze two people into it) we bought at Walmart for Barr Camp on the way back from bagging Pikes Peak. How cold could it be at the midway point at 10,000′, we thought. The answer is very cold, but that’s a story for another post.
Though the Bishop Pass bag kept us cozy, it was cumbersome AF. The thing is an absolute monster behemoth. I did end up leaving it in the stuff sack, but probably would’ve been better off shoving it directly into my pack. It weighed in at 3 lbs 5 oz as I opted for the tall version. Apparently, it has a glow in the dark zipper too, but I did not notice.

My mind was BLOWN when our lead guide, Lindsay, told us to stuff our parkas in our buffs to make a pillow if we didn’t bring one. I’m going to be an adult the next time I sleep outside and buy a camp pillow, but this was absolutely luxurious after my usual method of just balling up random stuff from my pack. The fancy goose-fill parka stuffed into the buff legit felt like I was relaxing in a real bed, rather than the middle spot on a shared bunk with my climbing team on a wooden pallet. I didn’t take a picture of this, but just take my word for it.
Shoes + Socks
Oh my god, the shoes. I had read extensively about mountaineering boots, and the consensus seemed to be unanimous – the double plastic boots were dogshit. However, since I didn’t think I would be buying double boots any time soon, I chose not to make that investment – I did look at both the Mammut Nordwand 6000 High ($999) and the Scarpa Phantom Tech HD ($999) but couldn’t justify the cost without knowing if I’d even enjoy the conditions that they’re meant for (spoiler alert: I very much enjoy the conditions).
So, we rented. There were no other options, just the plastic ones. They fit weird. I opted to size up like I do with my running shoes but they truly felt way too big the entire time, even with thick Farm to Feet (the best) socks. The half size down though really felt too small. I asked IMG staff what would be better, and they suggested the larger size in case my feet swelled, which made sense.
Shannon and I panicked a little bit when we showed up on day 1 and a few group members mentioned they’d gone to Whittaker Mountaineering to rent the Scarpas instead of using the plastic boots. At that point though, there was nothing we could do. A girl even looked at Shannon’s boots and said “oh, vintage!!” which feels like ~*not*~ something you’d want to hear.
But to be fair, they felt COMPLETELY FINE during the ascent. Not an issue at all. The descent, though… I could not explain the absolute terror dread of my toes slamming into the tops of those boots. I’ve never personified my toenails before, but I could feel them crying out with the ferocity of the fire of a thousand suns with every step. That last mile down to Paradise, we for sure lost our will to live. Our guides complimented us for the collective positive attitude of our group, but good god was I dramatically and audibly begging for mercy on that last stretch.
An important thing to mention is we started in the mountaineering boots instead of in approach shoes, which was very different from Baker – snow started about 20 minutes in to the trail, so it was a good call, plus we didn’t have to carry an extra 8 pounds in boots on our back. But it did make for a lot of vert in those clunkers.
Fun fact to close on the shoes: Shannon and I realized, simultaneously, about half a mile from Paradise, that we had our camp shoes on our packs the whole time and could have switched into them for the last 30 snow-free minutes. Oh well. Miraculously, all of my toenails are still intact (for now)
For socks, I brought 1 pair of Farm to Feet medium weight hiking socks, and was too scared to use anything else. A thinner merino pair from Tracksmith (an odd choice for sure) kept my feet happy and not disgusting at camp. I did bring a third pair of wool socks, from nine thousand years ago so I don’t even know how to link them but was so paranoid about feeling OK in the boots that they ended up coming back unused.
A tale of 9000 layers
So many layers!!! It feels overwhelming to try to break this down, but I’m going to do my best. Here’s what we packed
- Base Layers – I had thicker options but remember getting burned (pun intended) from Baker last year on stuff that felt way too warm and lived in my sun hoodie. Instead of bringing a thicker option, I bought this super cute tie-dye situation from Mountain Hardwear ($72) and brought my Alpenglow hoodie from Black Diamond which felt like it brought along with it good juju from Baker. These hoodies are expensive, but I got the BD one from REI on a super sale by searching men’s sizes – I paid $38 and they’re usually over $100! I also brought (1) base layer pant to sleep in, the REI merino 185, which also goes on sale pretty often if you keep an eye out. Your guides will probably tell you this at gear check, but DO NOT bring thicker layers for your base tops than the sun hoody. It is all you need because it is the best. I lived in it. It was so hot in the tent that if I knew I wouldn’t have gotten 3rd degree sunburns I would’ve walked around in a sports bra. It gets HOT.
- Soft Shells – I’m TALL (I tell people that I’m 5’11 and that’s what it says on my license, but I’m probably 6’0) so making sure that my pants wouldn’t look like clamdiggers was a non-negotiable. I LOVE these Halle straight pants ($95) from Prana. I wear a 10 in the tall inseam and they were maybe a little loose, but gave me some room in case I needed to put a base layer on underneath. We lived in them for three days and they did get a little gross at the end but that is my fault and not theirs. For the soft shell top, I chose the Mammut Aenergy jacket ($139) which I loved in all ways, particularly how light and packable it was (123 grams!) – my only complaint was that I chose a navy color, but that’s just an aesthetic gripe. The one I linked is a slightly upgraded version of the one I bought almost two years ago and comes in some nice colorways (I might need the green!!).
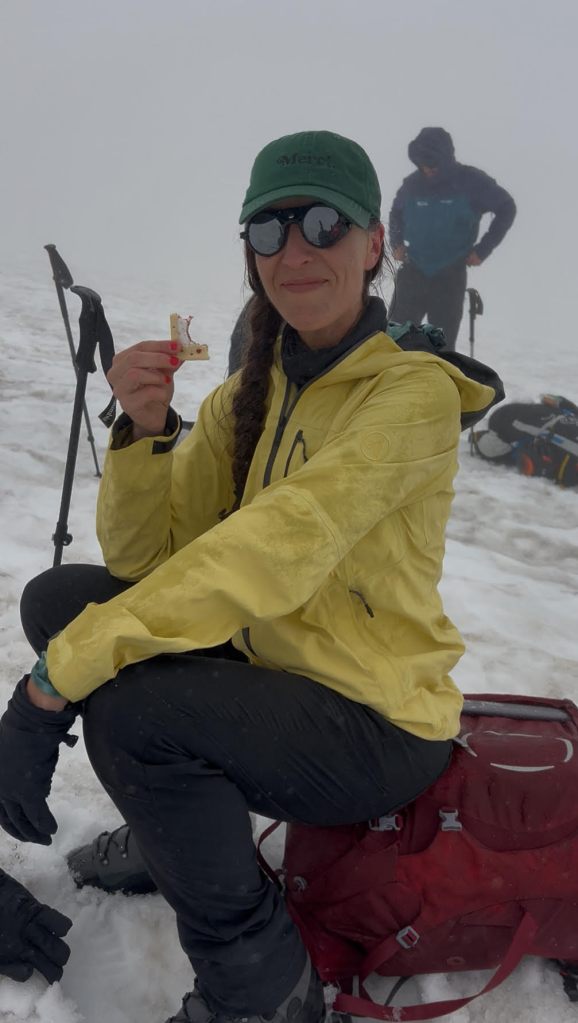
- Hard Shells – These are expensive in a way I don’t think I understood until it came time to buy them, so definitely keep your eye out for deals. Super grateful to have had the hard shells on our ascent up to Muir where we were caught in a messy almost whiteout and a LOT of precipitation. Shannon can take the credit for finding these, and we both bought the Artilect Shadow Canyon jacket ($341.73, on sale) in different colors (this is a theme) when she found them on super sale before our Baker trip. This is one of those pieces of gear that you’re hopeful you don’t need to use, but you’re very happy to have when the need presents itself. A pro tip I would suggest is practice putting on your hard shell pants over your soft shells and boots because fussing with them at 14,000 feet or in the middle of a rain storm ~*is not it*~. I bought the Mammut Alto Light HS pants ($101.40, on sale) and both pieces kept me dry.
- Midweight Layers – for midweight, I brought two on this trip– a puffy and a ultralight insulated layer.
- For the puffy, you can splurge on the major brands like Mountain Hardwear ($251.99), Arcteryx ($400 is wild but that two tone green is NOICE), or Rab or you can spend $119 bucks on the Decathlon Forclaz MT100 and maybe look like a pineapple but also be warm and it serves it’s purpose. A fun fact is Shannon and I both came on the Baker trip not knowing the other had this exact puffy in surface of the sun/minion yellow. But looking at the link now, they offer more normal colors and the yellow is nowhere to be found. If you don’t like any of the options I linked, a search for ‘insulated puffy’ will give you more options than you’re prepared to digest.
- For the UL insulated layer, I chose the Mammut Aenergy Light ML Half Zip Pullover. I LOVED IT. It was super duper light (164 grams), warm, and looked great on. I wish the alvatern-mammut red colorway was available when I was buying but I set an alert for when it pops back into stock again. This layer could be a fleece or even maybe a thicker base merino wool base layer if you have either around already, but it’s nice to save some weight with this option if you want to upgrade this portion of your kit.

- Gloves – this was very confusing to me and as I started to outline this, I realized I never used a liner glove (oops). I need to remember to ask Shannon for the ones she used (I think they were North Face, something like these). I basically stayed in my ‘light’ softshell gloves from Outdoor Research ($39.99) the entire time and was fine. The did start to rip at the seam, which feels like it needs to be said for transparency, but other than that I had no issues. My summit gloves were these Giordini Swaggers that I stumbled upon after someone in a subreddit recommended them. They were less than $30 bucks with Gore-Tex and worked great in the cold and wind. No complaints! I didn’t buy heavyweight mittens, but rented some from IMG – never had to use them, but glad I had them just in case – they were Outdoor Research also, something like this ($125.37). We paid $23.00 for the rental, so one of those items that I’ll keep a look out if I see a sale but feels pretty economical to rent
Head + Face
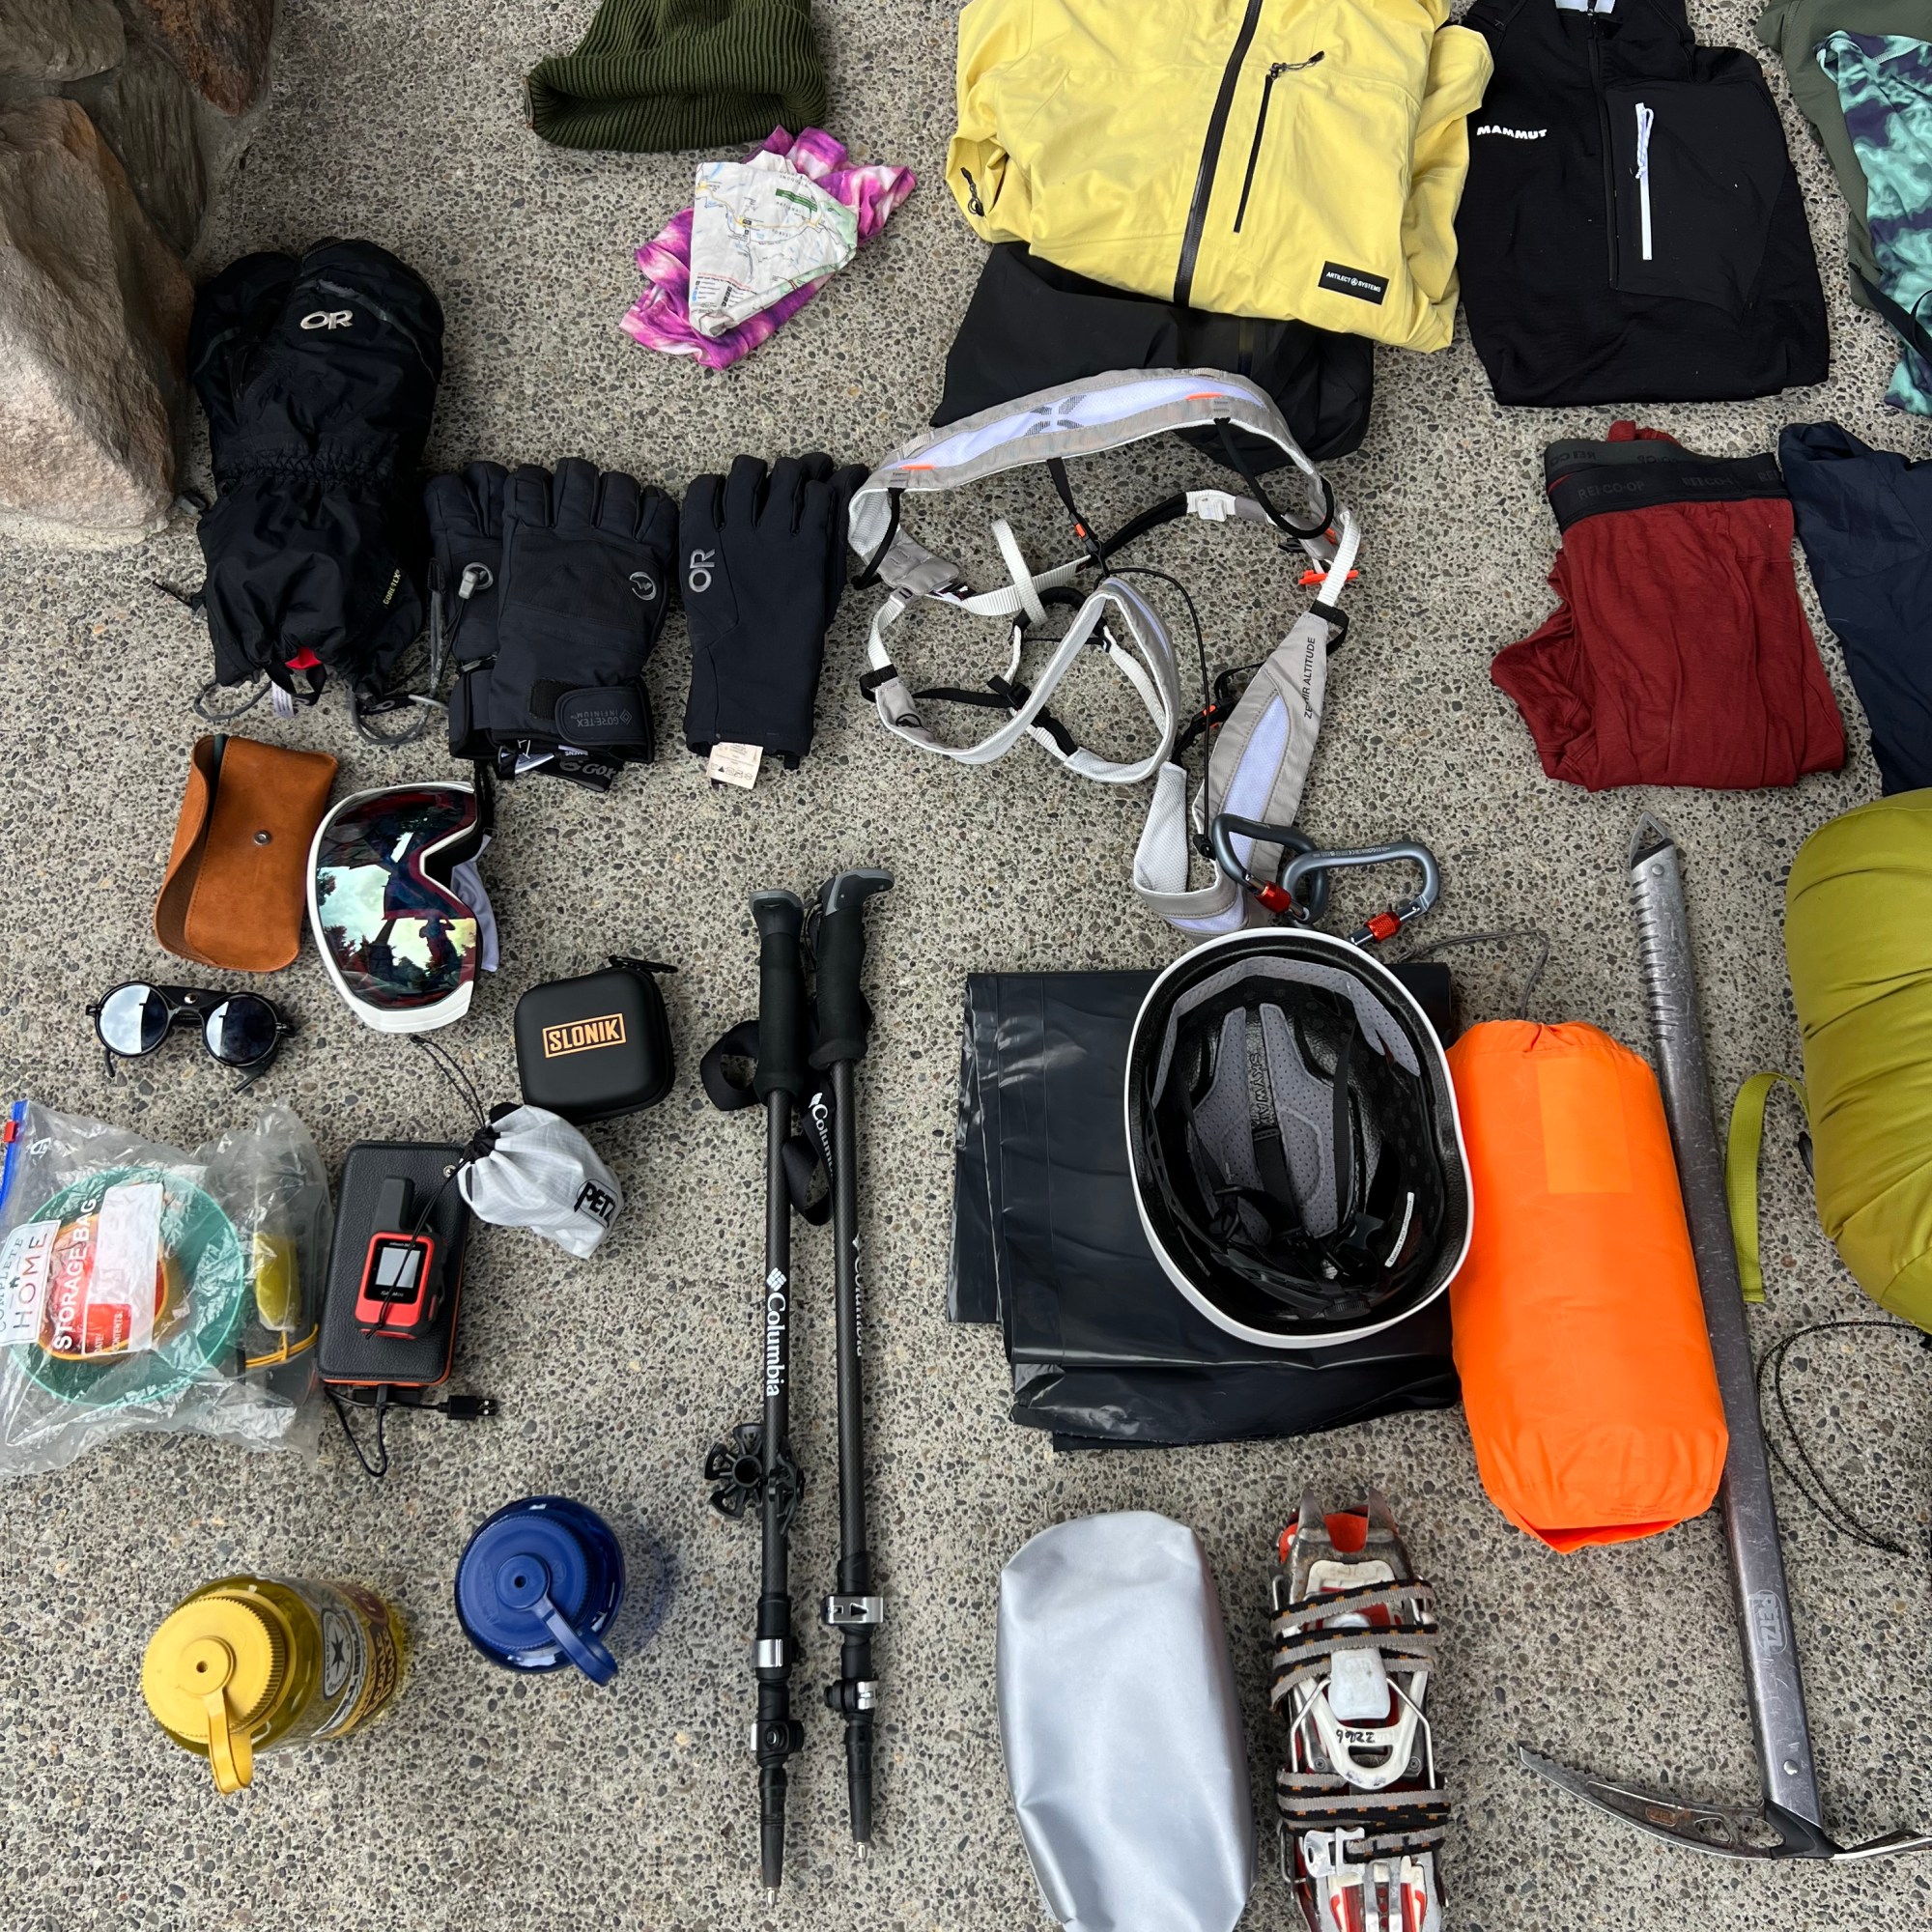
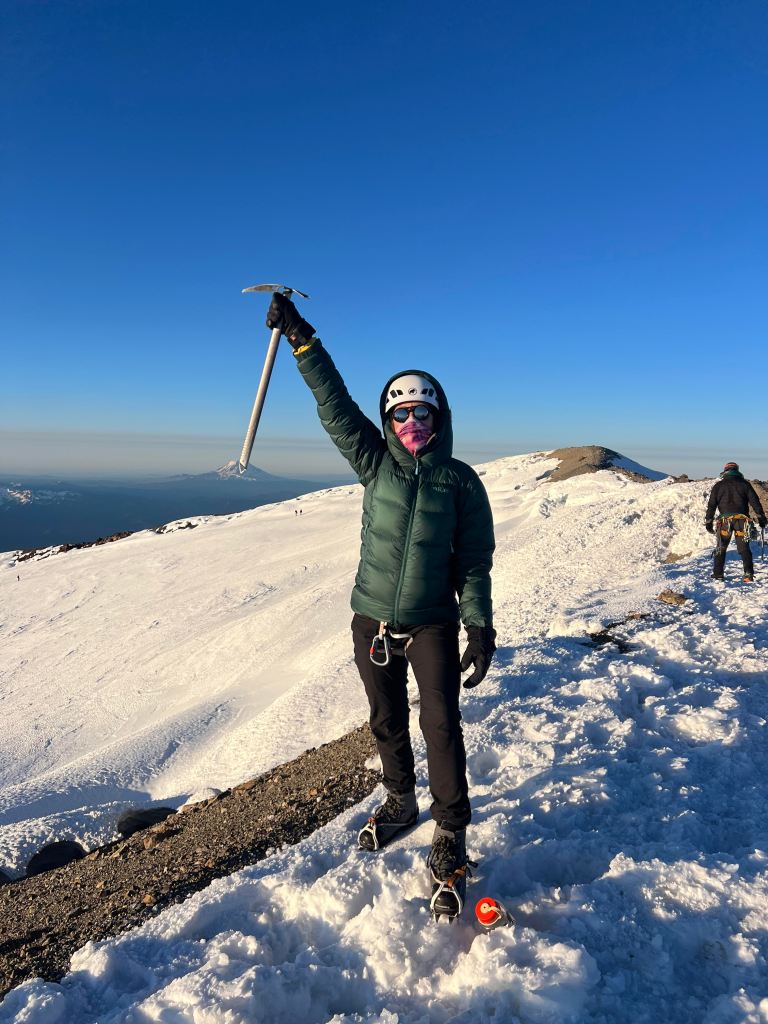
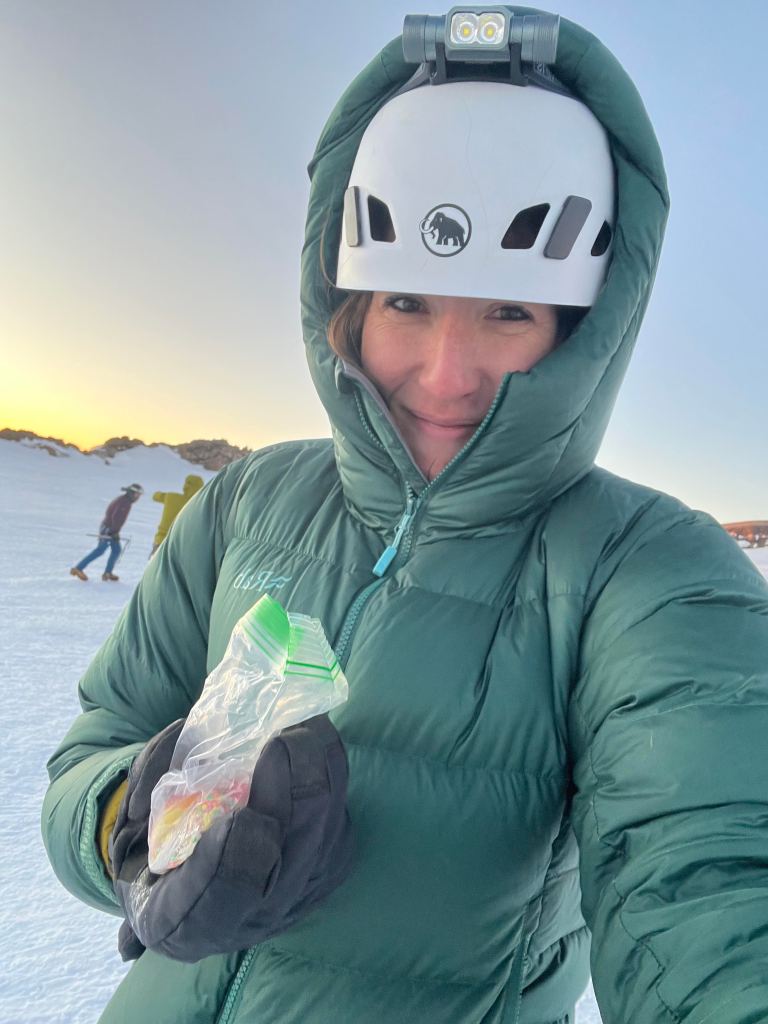
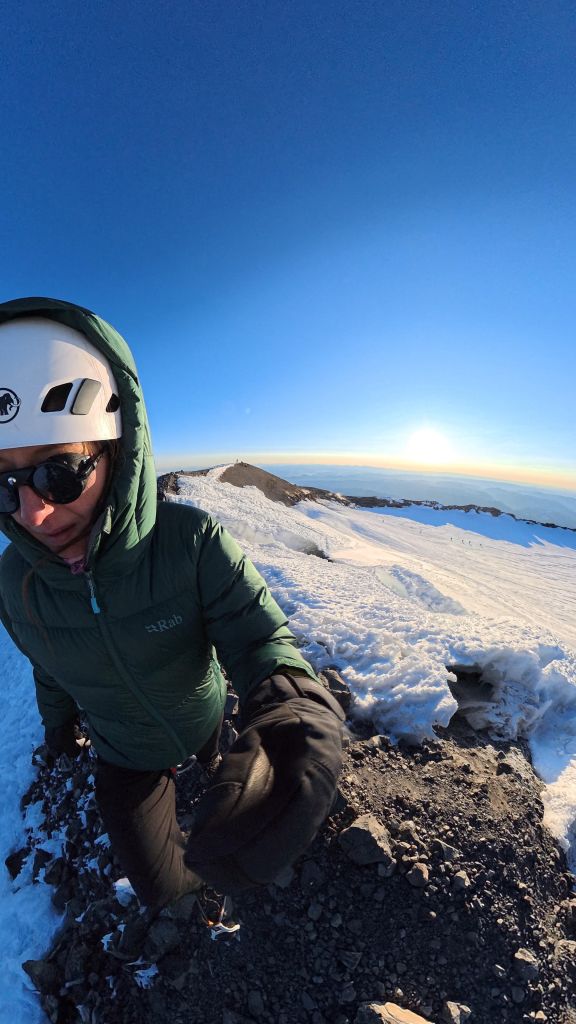
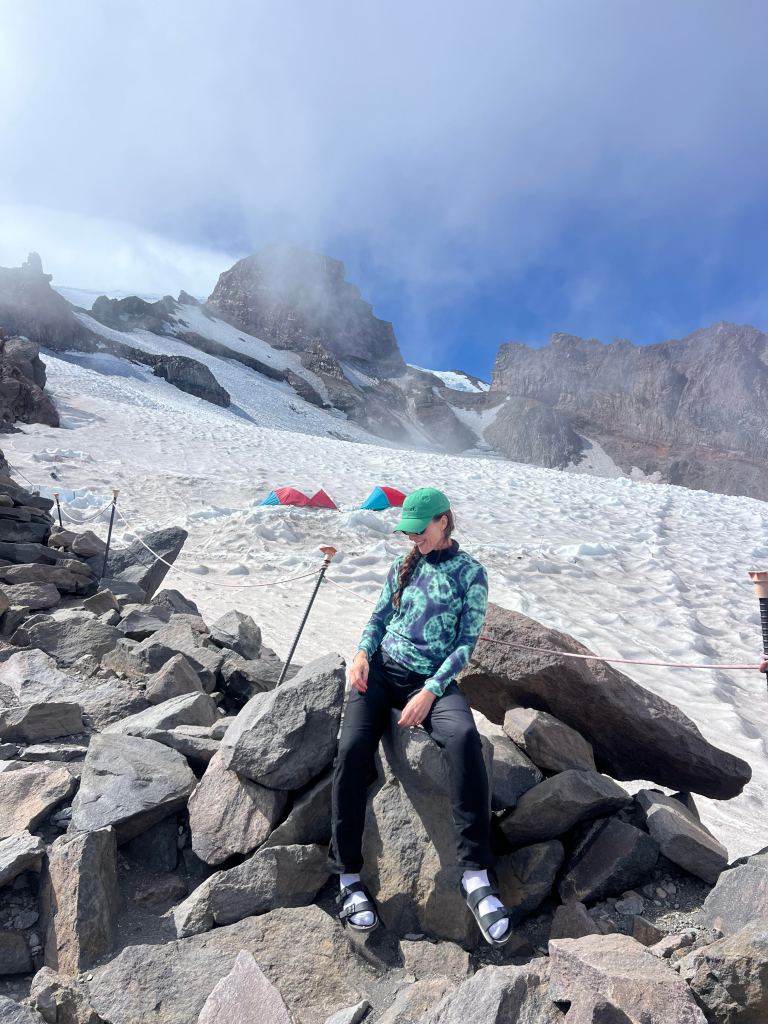
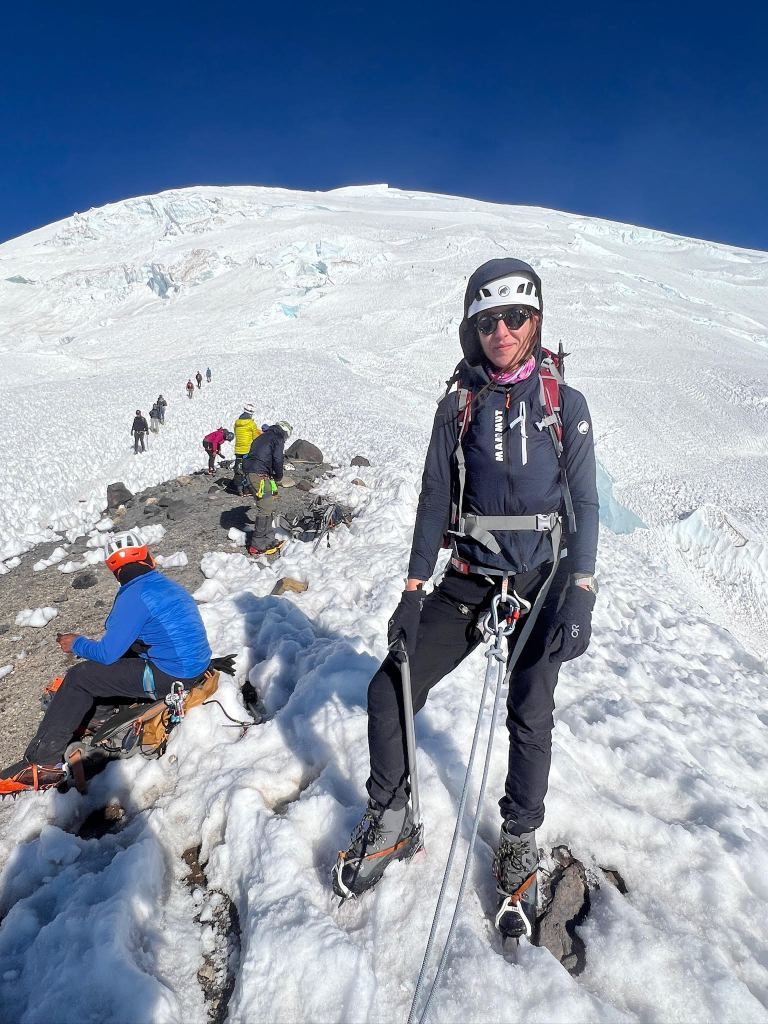
This stuff doesn’t need to be gone into as much detail so I’ll outline it in more of a list, starting with the important stuff. Also, I’m wearing all of this stuff in the pictures above so check them out if you want a visual aid!
- Headlamp – I used the Petzl Swift RL and fuck this headlamp, for real. I’m linking it just so you can make sure you buy something else. It was fully charged when we left, but I was about to walk over a sketchy snowbridge next to a super deep crevasse as this headlamp just flashed 5 times and then essentially died. I truly can’t think of a worse time for it to go out than when it did. I had a small moment of panic before asking Lindsay, our lead guide, to shine hers over the snowbridge so I could see to cross. The headlamp was not cheap at $129.95, either. I ended up switching to my Amazon backup for the rest of the ascent until daybreak. So, yeah, no suggestions here. Comment and let me know if you find something good haha.
- Glacier Glasses – these are an absolute non-negotiable. DO NOT scrimp on these – you need something with cat 3 lenses so you don’t have snow blindness. It’s absolutely impossible to climb without these. I got the Heron glacier glasses from Vallon and they come in lots of different colorways. You can add a prescription also, which I probably should’ve done.
- Goggles – we had great weather, so I didn’t end up having to use these but had a pair from skiing, but if you don’t have them already, I would rent them for $23 bucks instead of buying
- Sun protection – I used two different buffs because ~*fashion*~, this zinc sunscreen, this zinc lip balm (a non negotiable also). Something to note is my entire face (and Shannon’s too!) got chafed SO. BAD. My nose/upper lip area was peeling and feeling gnarly for a few days – so if you have some healing ointment and can sacrifice a few grams of weight, I think you’ll be happy to bring it.
- Hats – I brought a beanie from Columbia and a regular baseball cap from REI – I don’t think you need to overthink these, whatever you have and would feel happy wearing, bring!
Climbing & Personal Equipment
- Backpack – I briefly discussed my pack in the intro to this post, but I used the Osprey Ariel 65L ($207.97 on backcountry). I think there have been quite a few advances in packs since I bought this one and it looked very cumbersome in comparison to my climbing partners, so if you’re starting from scratch I’d recommend a trip to REI or your local outfitter to try on the packs and see how they feel. My pack felt ok at first, but honestly I did less pack practice than I should’ve and in full transparency it did not feel all that great after some time. I had to make adjustments at almost every break to take the weight off my hips, then my back. Basically it felt like a game of whack a mole on the hotspots.
- Climbing Harness – I rented a petzl for Baker, but decided to invest in one for Rainier and chose Mammut’s Zephir Altitude ($99.95)- it’s super lightweight and comfortable – definitely felt like a huge improvement from the one I wore last year which was bulky
- Carabiners – I used two Black Diamond Rocklock carabiners ($24.95/each)- a fun fact about me is that I showed up to Baker gear check with carabiners that were definitely not rated for climbing and in retrospect, I probably wouldn’t have trusted them to hold my dog, much less my 160 lbs dangling in a crevasse. But we are all beginners at some point and I’m sure that will make a good story for that guide for years to come.
- Helmet – originally purchased for Baker, I brought the Mammut skywalker 3.0 climbing helmet ($69.95) and have no complaints and thankfully, did not test it
- Trekking Poles – I finally invested in carbon poles and had no complaints. I think there’s a huge spectrum for poles and did I notice a huge difference on carbon vs non carbon? Not really. To be honest, I had a Capital One shopping rebate so these were free, and had I not I doubt I would’ve upgraded. So if you have some already, just use those. When you ascent up from Muir, you won’t be using it anyways as your ice axe will be in your hand
- Ice Axe (Ice Tool)– we rented these for $30, because flying with them felt silly.
- Crampons – we rented these also for $37. I will be buying a pair for my next trip though – the ones I got were shifting funny and weren’t in the best condition. The guides did a great job of adjusting them and checking in with me on them during breaks, but I will probably upgrade this especially since the price point (around $150) will pay for itself in a few climbs
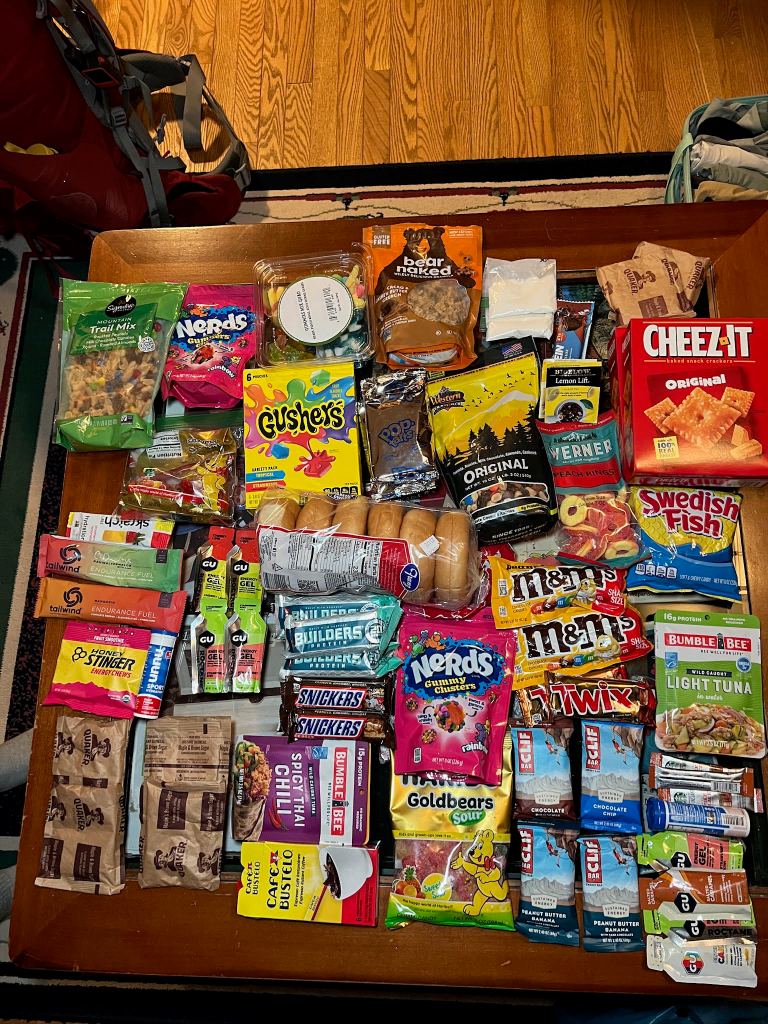
Food
I have too much to talk about on this so it’ll be a separate post – until that materializes, here’s a sneak peek. Yes that is ~*two*~ boxes of cheez-its, and there’s a fun story behind them. Lol.
What I’d Do Differently
I honestly think I’m pretty happy with how I packed and carried everything- I’m grateful that we did Baker first as that gave me a bit of a foundation on what not to do (rely on REI pickup in Seattle for half of my packing list because most of it was out of stock, for example). Something I found super helpful was to lay everything out with a printed copy of the gear list and check everything off one by one. It’s overwhelming to try to do it from a phone and I prefer the old school tangible cross off method.
- I would 100% upgrade the boots, and to be fair, maybe the fancier ones would wreck me too, but I would like to give my toes a fighting chance to find out.
- Bring my own crampons, with a holding bag – I wrecked my bag keeping them in the front pocket of my pack
- Test my headlamp by keeping it on for the time that I’d be climbing in the dark – I adjusted it to the brightest setting because I hoped it would, just, you know, work and apparently that was expecting too much. Petzl does list run time at different settings so I accept personal responsibility for not checking it, but I’m going to continue to hold on to the resentment for a little bit longer
Wins
Y’all can leave me to die on the camp shoe hill because I will carry these around forever. I don’t know how half of my team was putting on those clunky monstrosities to go pee in the middle of the night. Absolutely 100% not. It was so nice to change shoes and have something to walk around in. I will do enough lunges and deadlifts to be strong enough to always carry plastic Birkenstocks when I sleep outside.
I hope this helps some of y’all get organized for your climb! I know it’s overwhelming to amass all of the gear needed because there truly feels like a million different options and you can get stuck in reddit holes forever. You can also check out Shannon’s Rainier packing video here for a detailed breakdown and some amazing visuals! Feel free to reach out if you have any questions, thanks for reading!

Leave a comment